Introduction
Often, there is need for the same functionality in different projects, whether it is with custom classes, enums or even extensions on framework classes. In order to not reinvent the wheel over and over again for your future self, why not create a personal toolbox that can be imported in all projects?
This post will concentrate on Swift Package Manager (SPM), since this is the first party solution from Apple, which they baked in to iOS and Xcode in 2019. Be aware that there are other Package Managers like [CocoaPod][1] and [Carthage][2] that filled that void prior to that. They were and continue to be great tools as well.
The Personal Toolbox Package
Creating The Personal Toolbox Package
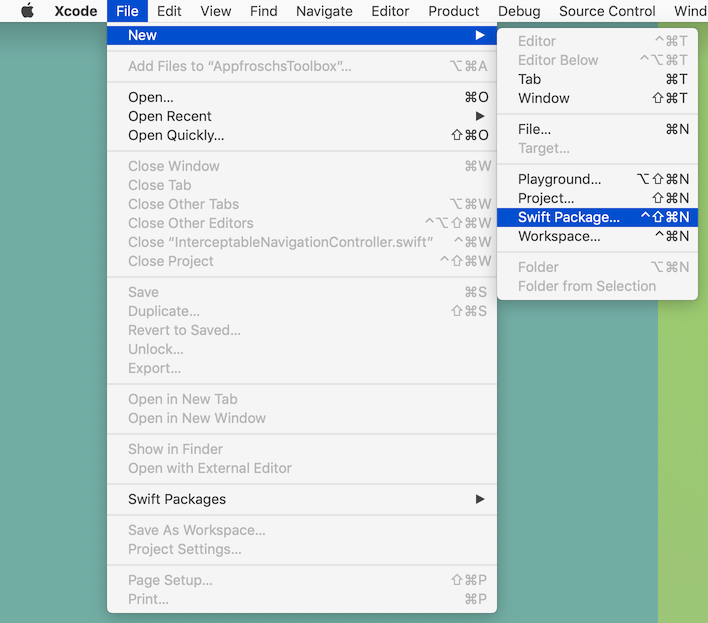
Creating a new package is as simple as creating a new project in Xcode – quite literally:
- Within Xcode, choose
File>New>Swift Package.
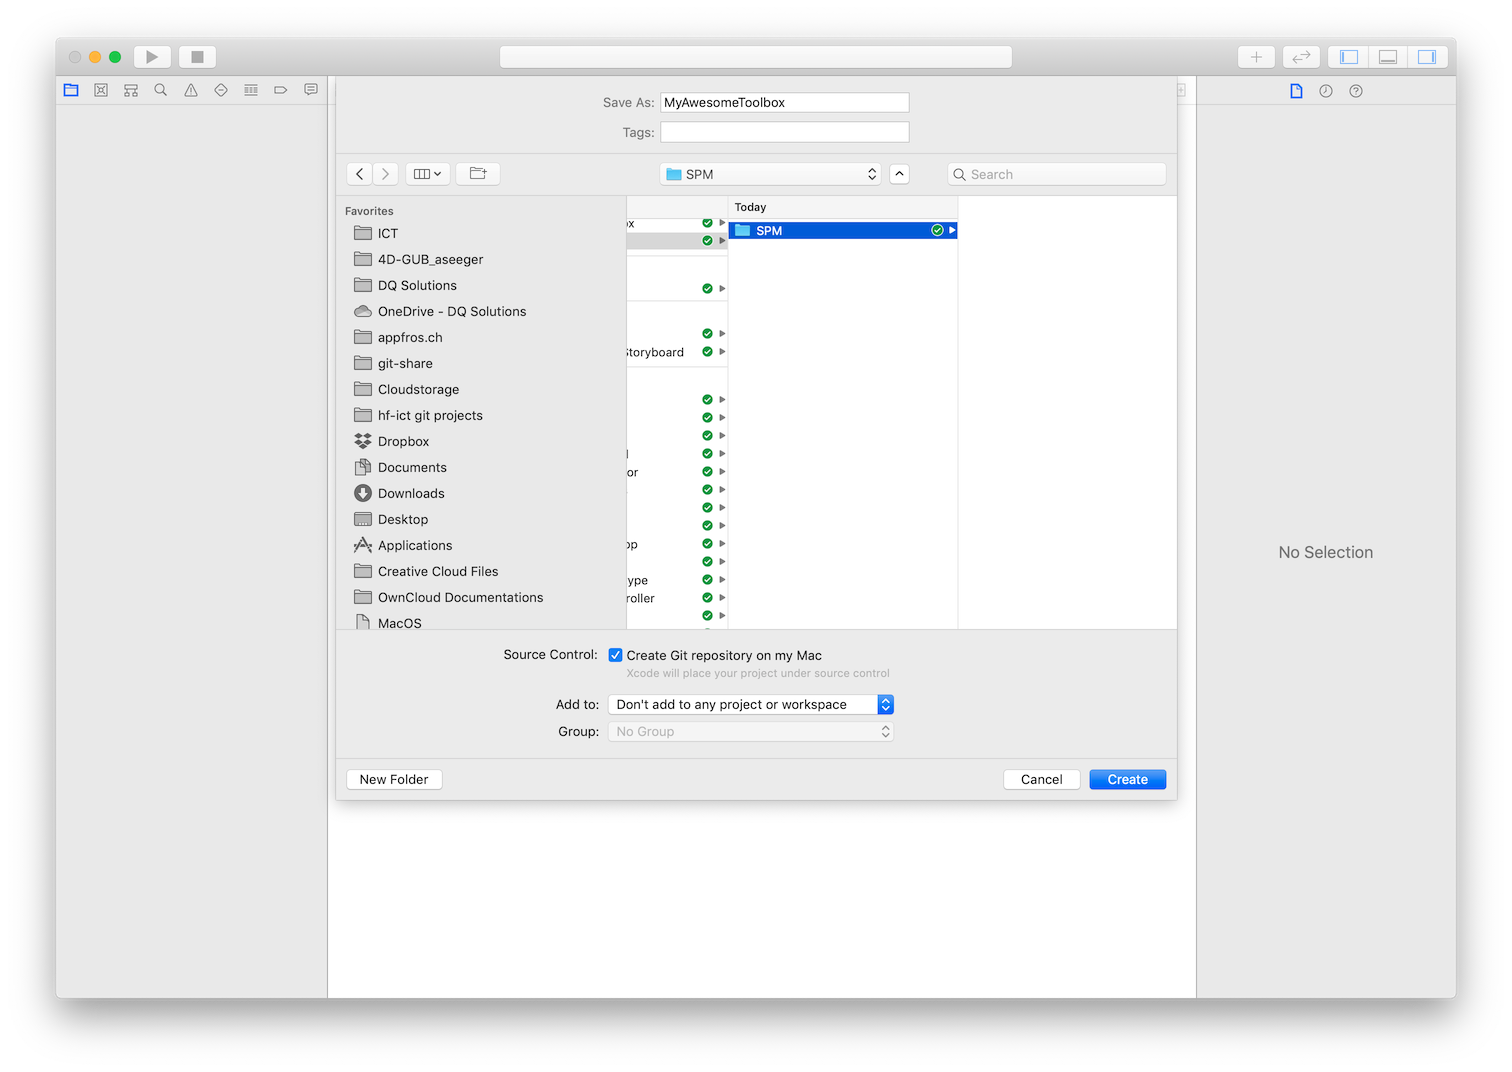
- In the create dialog, you will want to keep
Create Git repository on my Macactivated. Make sure to find a meaningful name and clickCreate.
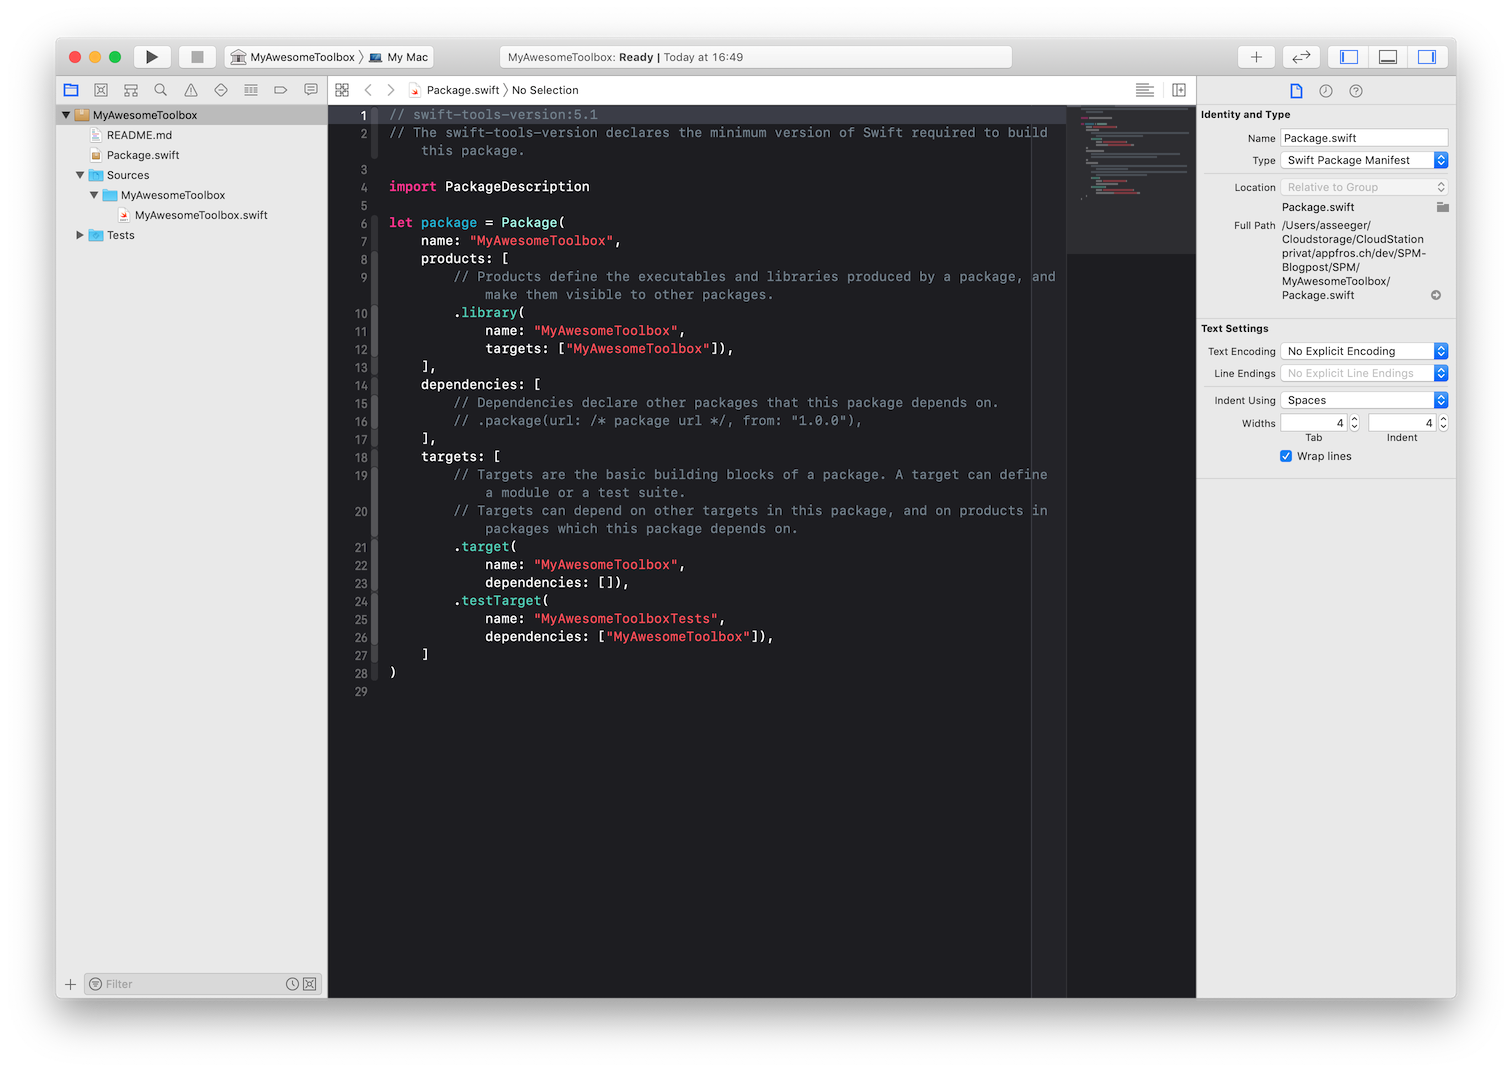
- Xcode will now create the Package and open the Package Manifest
Package.swift.
Adding The First Custom Class To The Toolbox
Something I want to add quite early to all of my projects is a wrapper to do decent logging. Because this is a pretty simple wrapper, I want to take this as the example for this post.
To add a new class, simply choose File>New>File or use the shortcut Cmd+N. Rename the newly created file to <DesiredName>.swift, where the important part (obviously) is .swift. Then, make sure to relocate this file to Sources><NameOfThePackage> (which is MyAwesomeToolbox in my example), if it is not already located there.
When the package was created, a template file with the same name as the package was placed under
Sources. This shows where the source files should go.
Alternatively, you can also just drag and drop existing .swift-files from other projects to Sources>NameOfThePackage.
So, for this example, I chose to add a new file called Logger.swift. The content of this file is as follows:
import Foundation
import os

///Singleton class to  enable logging with informations
///- on current file, function and line of code
///- a custom message
///- and a log type classification
public class Logger {

    ///The singleton instance
    public static let shared = Logger()

    ///Using `os_log()`, this method prepopulates `file`, `function` and `line`. Those values might be overwritten if neccesarry though.
    public func logToConsole(file: String = #file, function: String = #function, line: Int = #line, message: String, type: OSLogType) {
        let file = String(file.split(separator: "/").last ?? "")

        os_log("*** %{public}s/%{public}s, line %d -- %s", log: .default,type: type, file, function, line, message)
    }
}
It is crucial to define the package class and all properties and methods that are supposed to be used directly from within any project as
public. They won't be accessible if they are not.
Don't forget to commit the changes by choosing Source Control > Commit… at this point.
Connect The Package With A Git Remote
SPM relies on Git. So the package needs a remote repository where changes can be uploaded to and where the project can be added from in other projects.
A prerequisite to do so is connecting your Xcode installation with a Git server, be it Github, Gitlab or any self hosted solution. Adding the account is done from within the Settings of Xcode under the tab Accounts. Just click on the little + on the lower left and connect with the Git server of your choice.
Now, we need to add a remote (which has to be a git url):
-
Change to the
Source Control Navigatorby clicking on its icon in the navigator pane, using its menu or its shortcutCmd+2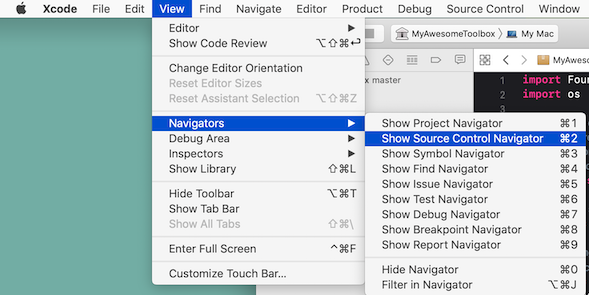
-
Right-click on the top level entry, which is attributed
Master -
Choose
Add Existing Remote, if you already have a remote repository created on the Git server or create a new one by clicking onCreate "MyAwesomeToolbox" Remote…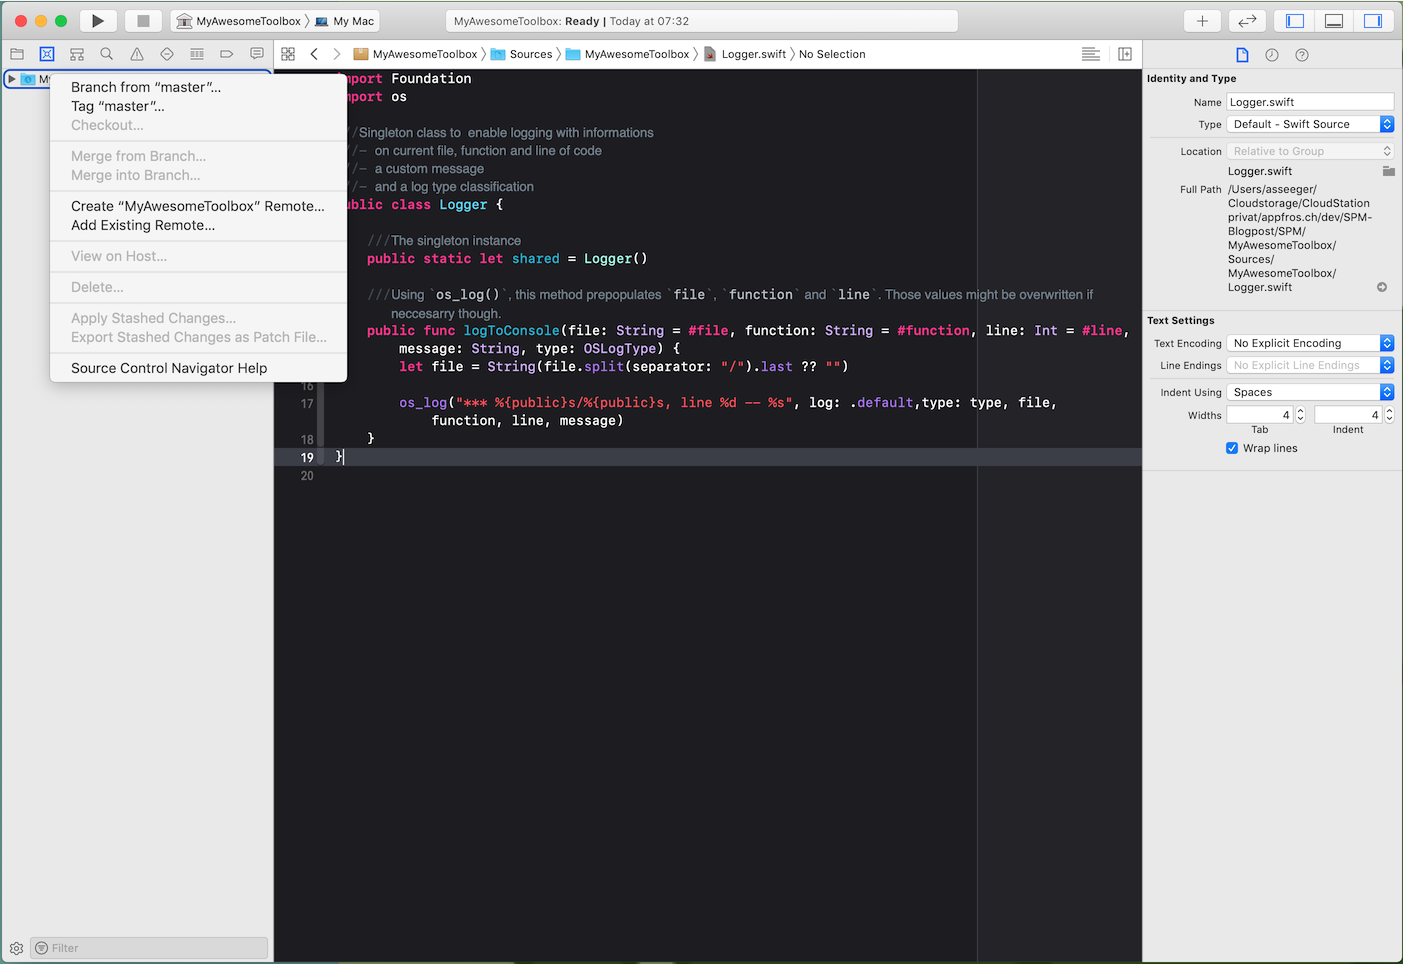
-
Check the
Createdialog (and add a Description, if you so desire) and make yourVisibilitychoice
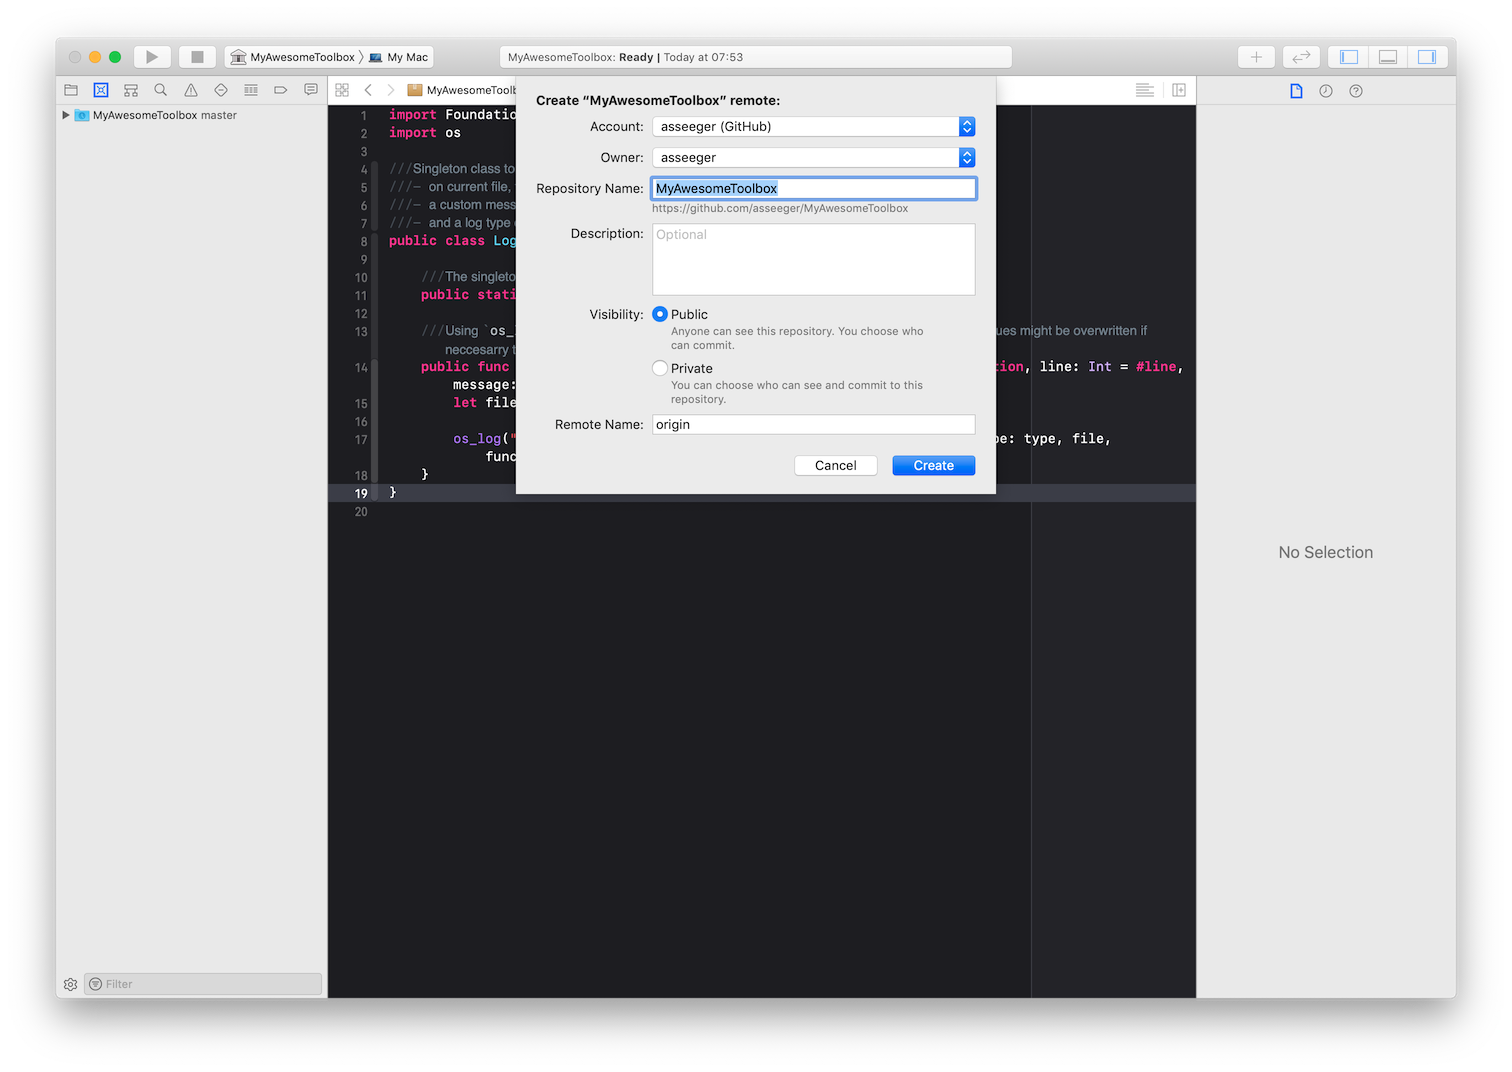
When concluding this procedure, Xcode will make the first push to the remote.
Using git's tagging system for versioning
Even though it might be obvious, it took me some time to figure this one out: the version of the SPM package follows the git version. This can be important if in the projects you want to use it, you are going to use the version options when importing the dependency (see below).
The Toolbox Package In Your Personal Project
Importing the Toolbox Package In Personal Project
Now, that we have created and uploaded our new shiny toolbox package, we can use it in any of our projects.
To demonstrate this, I first create a new project. Then, in the project
-
Choose
File>Swift Packages>Add Package Dependency……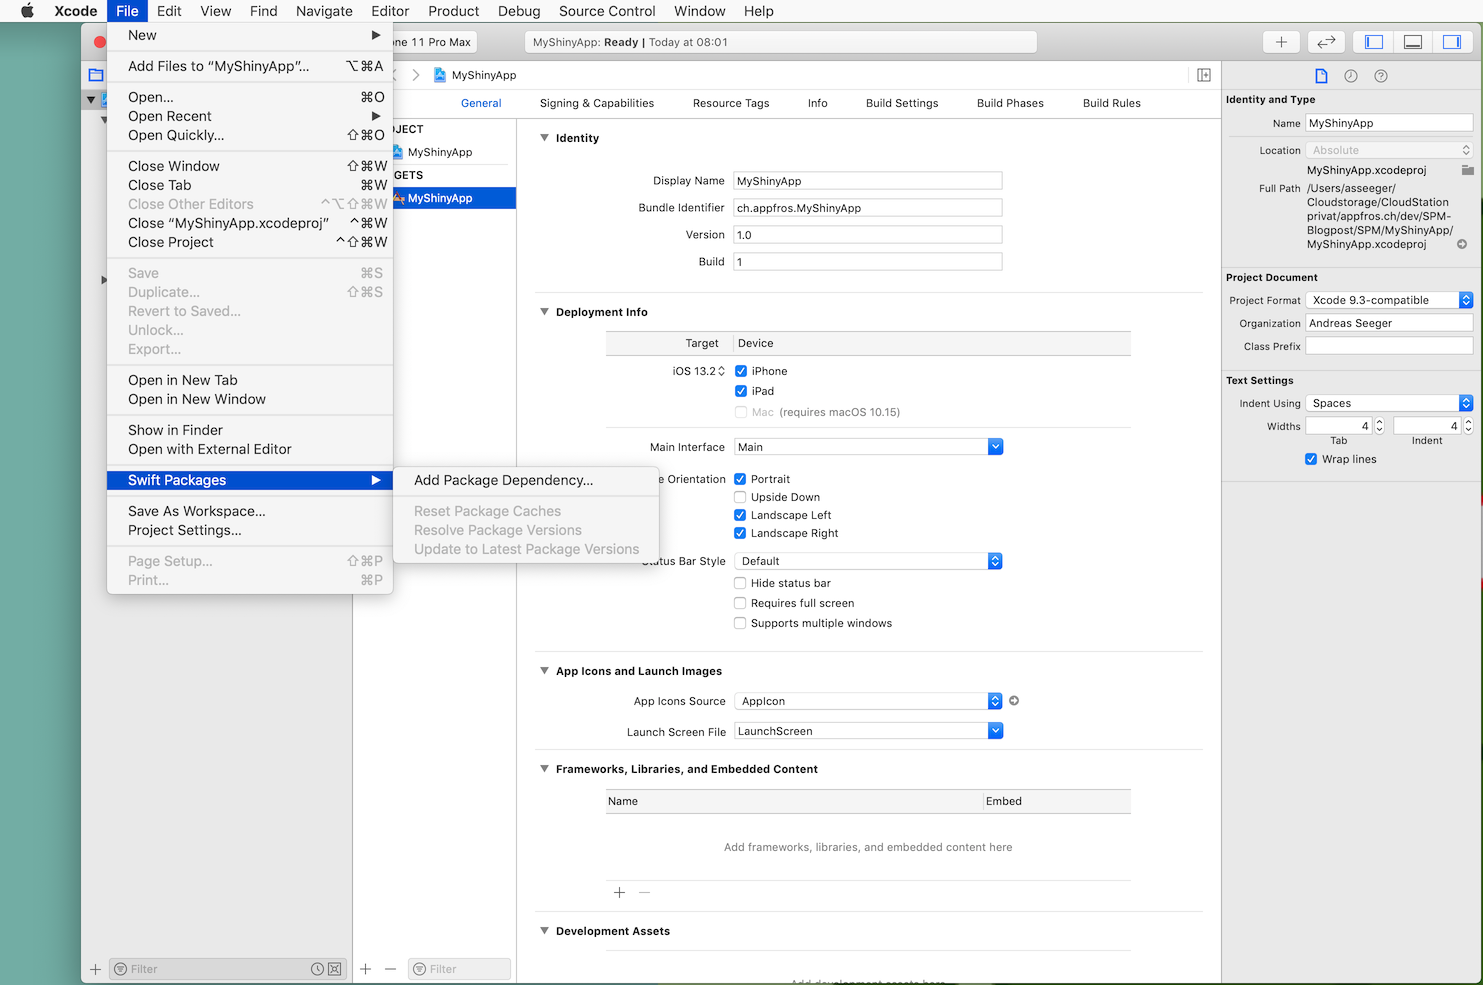
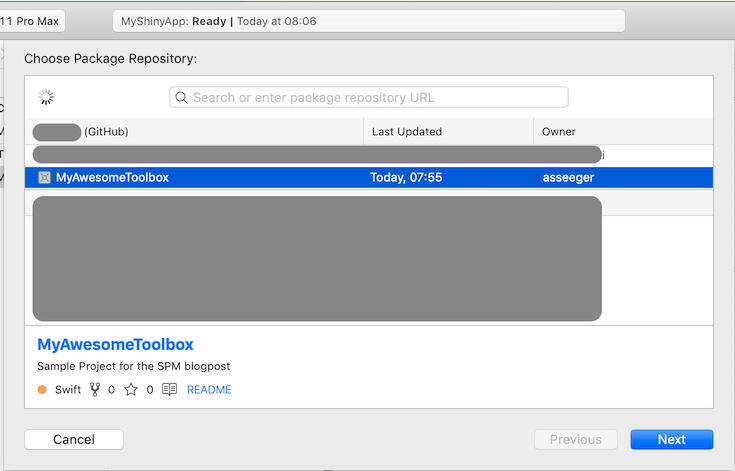
-
…and choose the package you want to add.
-
On to the package options – I guess for a personal package the best choice here is using the
BranchMaster (as you have control over it), but you can also choose to use a specificVersionorCommithere.
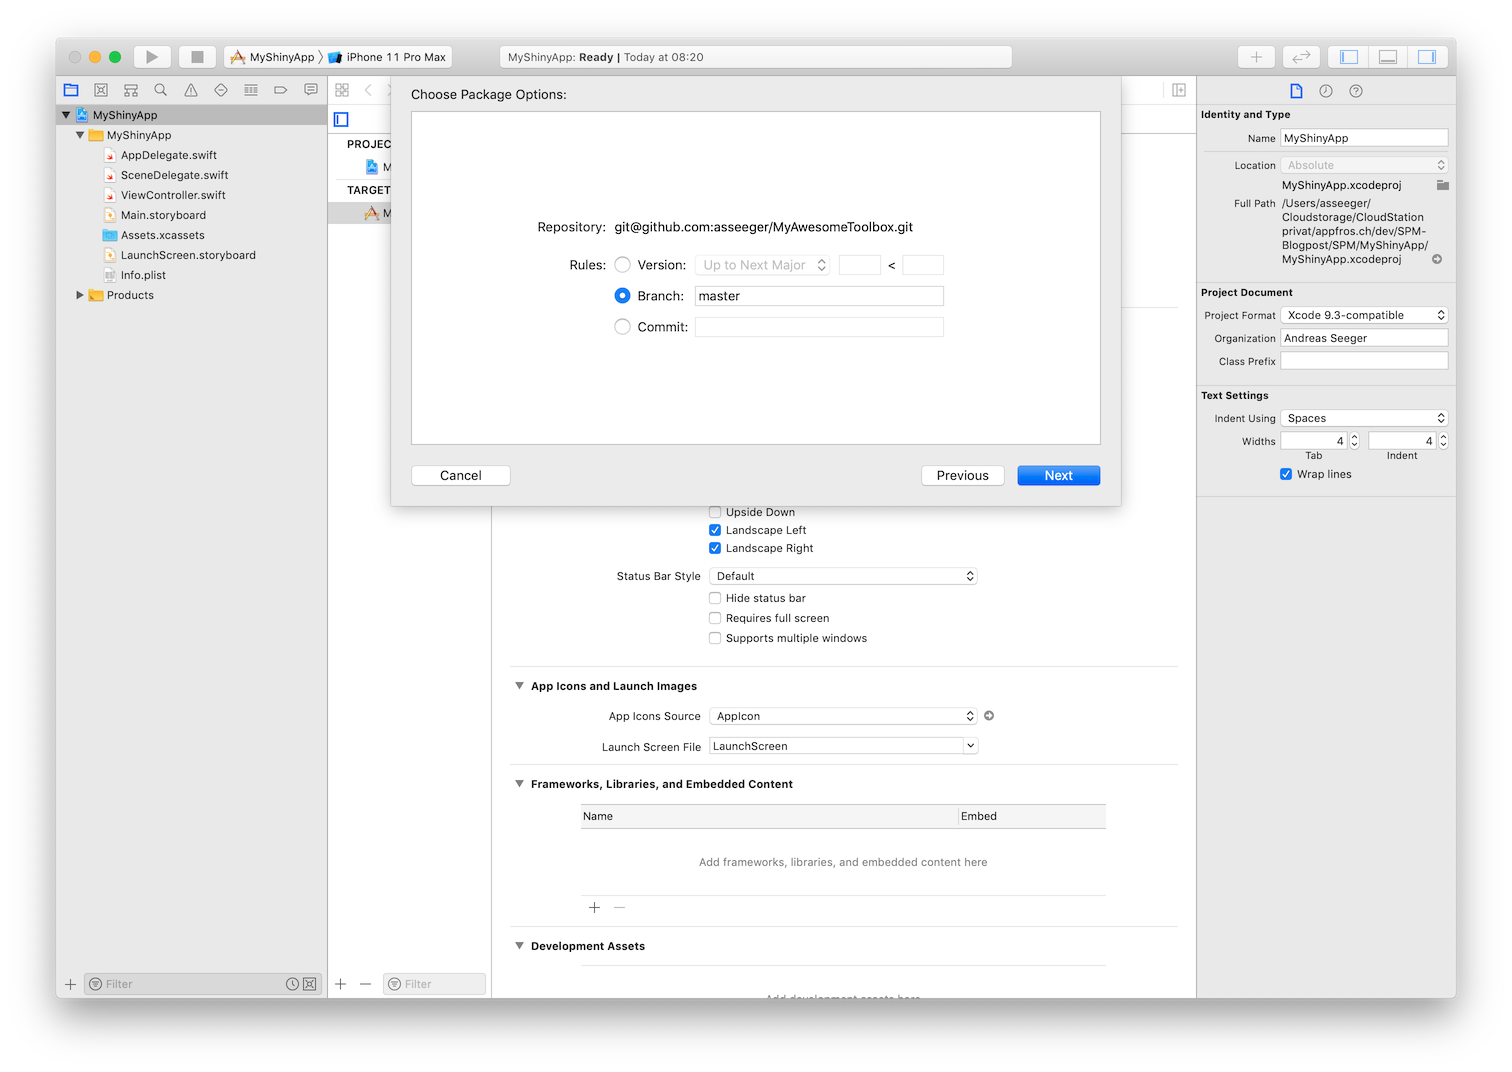
-
In the next dialogue, the package is added to the target of your app – if you should have more than one target here, make sure to connect with the right one.

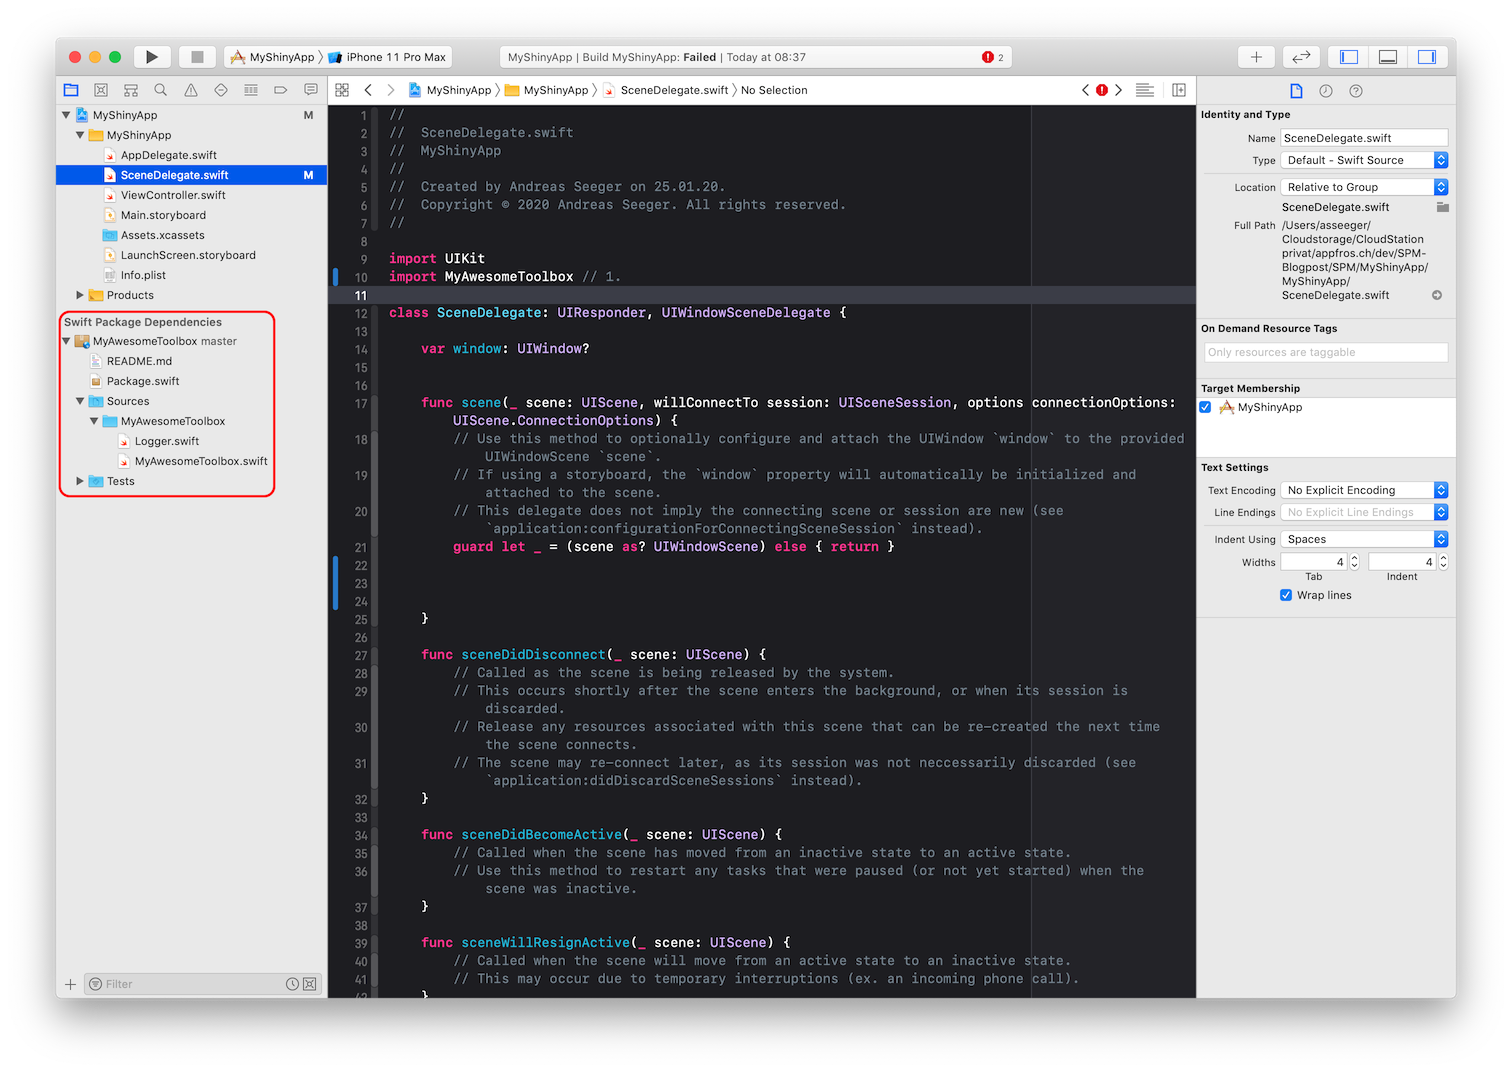
That's it – Xcode links everything together and builds in the background after which the package is ready to get used in the project. This procedure results in the following project structure:
You might get an error or two in your project at this stage – don't worry, we will handle this in the very next section!
Be aware that you will have read access only to all source files of your package – so you won't be able to write to it. It actually makes sense, when you think about it, because it is an external source after all. Should you need to make changes, you will have to do that in the package project itself – or use a little, neat trick, that I will show you further down in the section Developing The Toolbox And The Project Side By Side.
In the
Add Package Dependency…dialogue, you can also add any third-party package using its known public git url.
Using the package from within the project
For the sake of simplicity, I will now just add a log entry in SceneDelegate when the application session starts. To do so, I will have to
- import the toolbox
- make use of the toolboxes functionality
Sounds pretty straight forward, doesn't it? Well, in this concrete example we do have an issue: the os_log framework I am using in my Logger class is available only from iOS 10 or newer. But wait a second, my project has an iOS Deployment Target of iOS 13.2 set automatically when it got created – so what's going on here?
Updating the package's manifest
Well, turns out that the package itself needs to have informations on the target OS as well, whether it be macOS or iOS. This information needs to be placed in the package manifest, the Package.swift file under the platforms section.
So, head over to the package's project and add this information. After doing so, the manifest should look like this:
import PackageDescription

let package = Package(
    name: "MyAwesomeToolbox",
    // Add the minimum version here:
    platforms: [
        .iOS(.v10)
    ],
    products: [
        // Products define the executables and libraries produced by a package, and make them visible to other packages.
        .library(
            name: "MyAwesomeToolbox",
            targets: ["MyAwesomeToolbox"]),
    ],
    dependencies: [
        // Dependencies declare other packages that this package depends on.
        // .package(url: /* package url */, from: "1.0.0"),
    ],
    targets: [
        // Targets are the basic building blocks of a package. A target can define a module or a test suite.
        // Targets can depend on other targets in this package, and on products in packages which this package depends on.
        .target(
            name: "MyAwesomeToolbox",
            dependencies: []),
        .testTarget(
            name: "MyAwesomeToolboxTests",
            dependencies: ["MyAwesomeToolbox"]),
    ]
)
Make sure to commit to git and push to your remote after this step with Source Control>Commit….
Refreshing packages
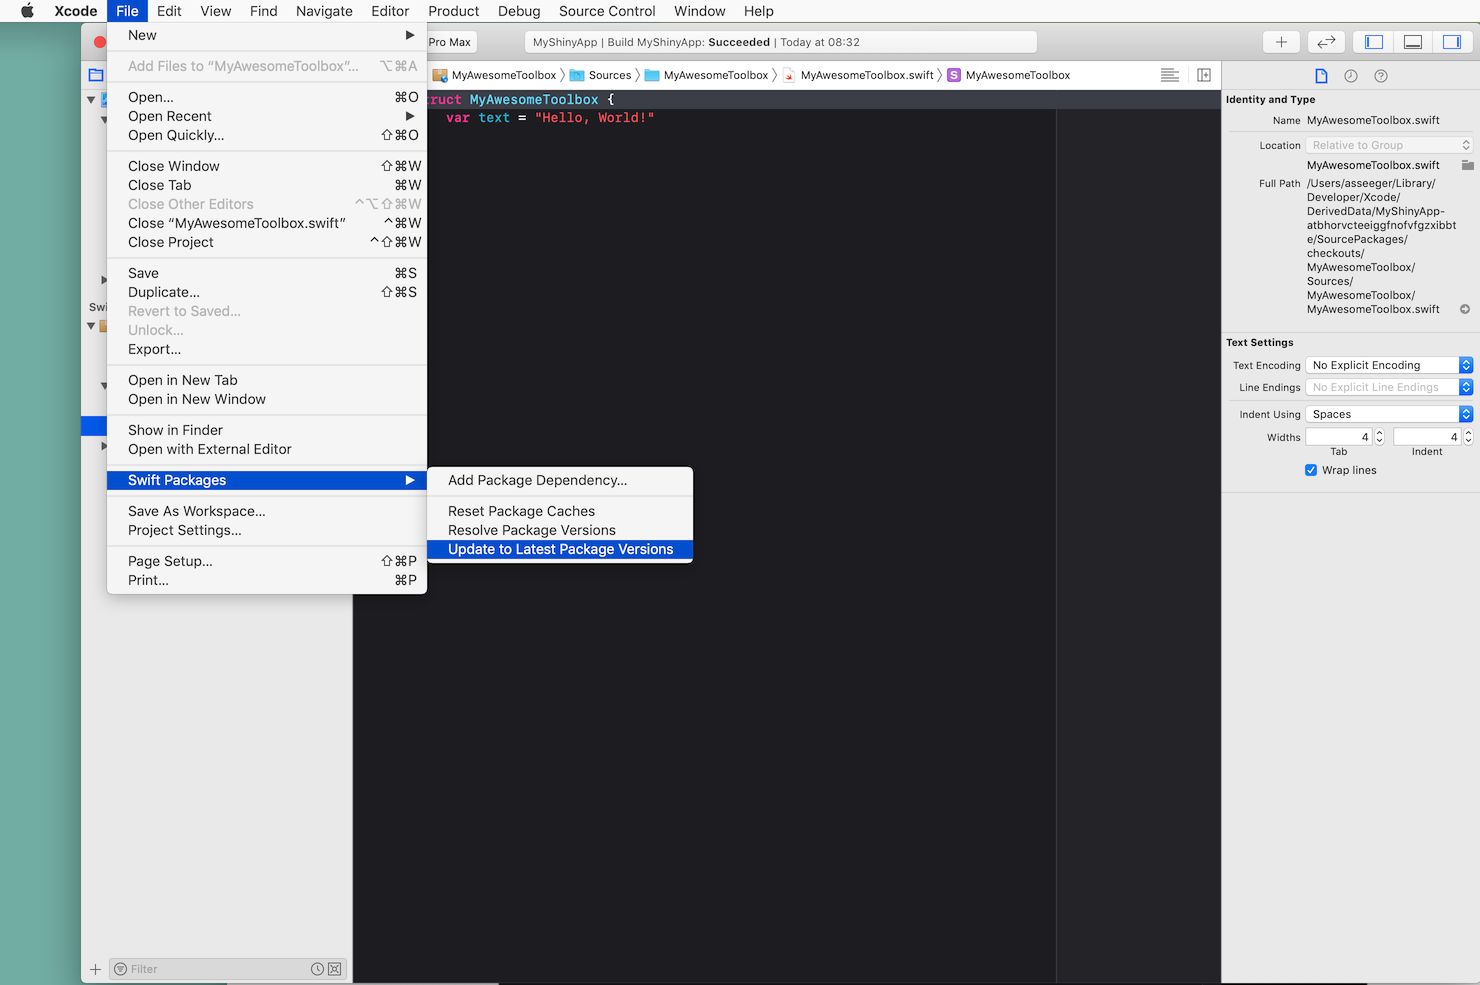
This change now has to be reflected in the project using the package. To update the resource from within your project, select File>Swift Packages>Update to Latest Package Versions.
When you now open the Package.swift from within the project, you should see the changes we just did to this file.
Also, you should now be able to use the packages functionality. The first part of the SceneDelegate.swift should now look like this and you should be able to
- import
- use the packages functionality
import UIKit
import MyAwesomeToolbox // 1.
class SceneDelegate: UIResponder, UIWindowSceneDelegate {
var window: UIWindow?

func scene(_ scene: UIScene, willConnectTo session: UISceneSession, options connectionOptions: UIScene.ConnectionOptions) {
    // Use this method to optionally configure and attach the UIWindow `window` to the provided UIWindowScene `scene`.
    // If using a storyboard, the `window` property will automatically be initialized and attached to the scene.
    // This delegate does not imply the connecting scene or session are new (see `application:configurationForConnectingSceneSession` instead).
    guard let _ = (scene as? UIWindowScene) else { return }

    Logger.shared.logToConsole(message: "Application has started.", type: .debug) //2.
}

//...
}
### Developing The Toolbox And The Project Side By Side
If you should have the need to develop your toolbox and your project side by side, right now the procedure is a bit tedious:
1. realise you have an issue in / require new functionality from your toolbox
2. switch from your project to the toolbox
3. make changes to the toolbox
4. commit to git and push to the remote
5. switch back to your application
6. update the toolbox in the project and make use of your changes
While this will definitely work, this is really only practical if you need to change something every once in a while. If you are building up your toolbox alongside one of your current projects, it might make sense to have a more imminent approach.
The problem is, as said above, that you don't have write access to the toolbox files. With a little trick though, you can gain write access: you need to import the toolbox locally.
To import it locally, just drag and drop the local _toolbox project_ to your project. This will have precedence over the toolbox _package_ dependency and will result in locally writable files. From within the `Source Control` \> `Commit…` dialog you will have both projects available to do commits for.
You will see that only the local representation of the package will be visible in Xcode after importing locally. The SPM package dependency will be transparent at this point.

> Do make sure that you have the toolbox project locally and drag and drop from Finder. A drag and drop from the package that I introduced as a dependency from within Xcode to my project did not work for me.
If at some point in the project developing side by side within the project should not make any sense any more for whatever reason, you can simply remove the local packages resources. After that the still available package added with SPM will take over again.
This little trick is documented by Apple as well: [https://developer.apple.com/documentation/swift\_packages/editing\_a\_package\_dependency\_as\_a\_local\_package][3]
### Conclusion
In this blogpost we took a look at
- how to create, commit, push and use a Swift package
- how to develop the toolbox package and the project side by side
### Links
[1]: https://cocoapods.org
[2]: https://github.com/Carthage/Carthage
[3]: https://developer.apple.com/documentation/swift_packages/editing_a_package_dependency_as_a_local_package