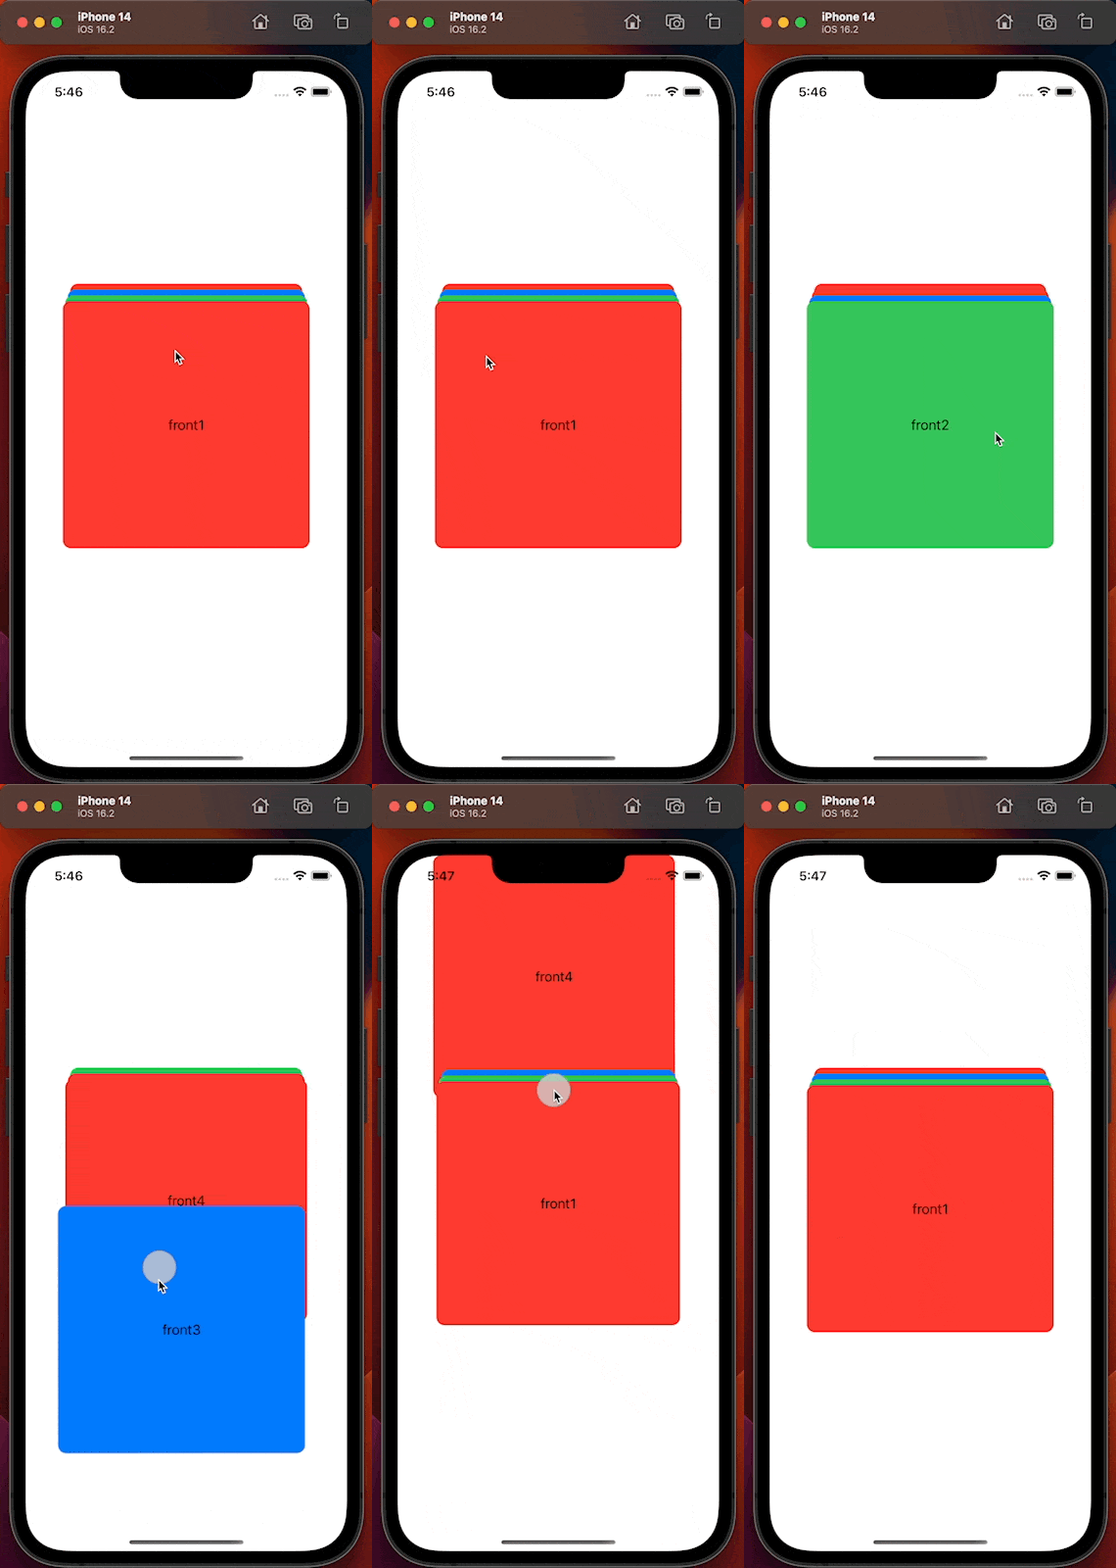
I recently wanted to create a view with a deck of cards. The deck should provide the option to remove the topmost card and put it to the end of the stack, thus bringing the 2nd topmost card to the top. Another requirement was to be able to show the back of the topmost card.
Here's what I came up with:
Creating a new proof of concept project
What I will do most of the times is creating a new project to just figure out this one feature/view I am trying to implement. I think there are some advantages to this approach of a proof of concept (poc) like this:
- being able to reason more focused on a specific issue
- having an artefact of code that can be easily shared should something not work as expected, e.g. when I need to ask a question on Stack Overflow
- having a project that I can then use for a small blogpost
- ...
In this specific case I was glad to have some succinct code because I had to reach out to the maintainer of the Swift package I was using, showing them the code I had come up with so far. But I'm getting ahead of myself. 😅
Implementing the Card struct
After having created the new project, I first created the Card struct like this:
struct Card {
    let id: UUID
    var frontLabel: String
    var backLabel: String
    var color: Color

    init(
        id: UUID = UUID(),
        frontLabel: String,
        backLabel: String,
        color: Color,
        flipped: Bool = false
    ) {
        self.id = id
        self.frontLabel = frontLabel
        self.backLabel = backLabel
        self.color = color
        self.flipped = flipped
    }
}
Even though I was not planning to introduce any persistence in this proof of concept (poc) project, I created Card as if I would have.
Introducing DeckKit
I had stumbled over Daniel Saidi's open source package DeckKit at some point–I probably saw a mention on Twitter (remember Twitter, anyone?). I knew when I saw it then that it must be interesting (it also with excellent documentation), but did not have a need to check it out until for this project.
Adding a dependency to your Xcode project is out of scope for this tutorial. So I am neither reasoning about whether one even should (and under which circumstances) add a dependency nor how it's techniqually done. Suffice to say that there is a tutorial available in Apple's Documentation.
After having added the dependency, making Card make use of the newly introduced package is done by conforming to DeckItem:
import DeckKit

struct Card: DeckItem {
    let id: UUID
    var frontLabel: String
    var backLabel: String
    var color: Color

    init(
        id: UUID = UUID(),
        frontLabel: String,
        backLabel: String,
        color: Color,
        flipped: Bool = false
    ) {
        self.id = id
        self.frontLabel = frontLabel
        self.backLabel = backLabel
        self.color = color
        self.flipped = flipped
    }
}
Creating the view
I had everything in place now to create the view of stacked cards. As data flow is out of scope for this poc, I created the card stack in the view directly. Im my real application I of course will have a ObservedObject for this.
struct CardStackView: View {
    @State private var deck = Deck(items: [
        Card(frontLabel: "front1", backLabel: "back1", color: .red),
        Card(frontLabel: "front2", backLabel: "back2", color: .green),
        Card(frontLabel: "front3", backLabel: "back3", color: .blue),
        Card(frontLabel: "front4", backLabel: "back4", color: .red),
    ])

    var body: some View {
        DeckView(deck: $deck) { card in
            ZStack {
                RoundedRectangle(cornerRadius: 10.0)
                    .foregroundColor(
                        card.color
                    )
                    .frame(width: 300.0, height: 300.0)
                Text(card.frontLabel)
            }
        }
    }
}
The result is set of cards that I can flip through–awesome! 🎉

Adding the next requirement: being able to show the back of a card
The next part is something I could not figure out right away; my naive way to handle flipping a card to its backside was to introduce a new flipped State on the view and showing the back if flipped was true in the view like so:
struct CardStackView: View {
    @State private var deck = Deck(items: [
        Card(frontLabel: "front1", backLabel: "back1", color: .red),
        Card(frontLabel: "front2", backLabel: "back2", color: .green),
        Card(frontLabel: "front3", backLabel: "back3", color: .blue),
        Card(frontLabel: "front4", backLabel: "back4", color: .red),
    ])

    @State private var flipped = false

    var body: some View {
        DeckView(deck: $deck) { card in
            ZStack {
                RoundedRectangle(cornerRadius: 10.0)
                    .foregroundColor(
                        card.color
                    )
                    .frame(width: 300.0, height: 300.0)
                Text(flipped ? card.backLabel : card.frontLabel)
                    .rotation3DEffect(Angle(degrees: flipped ? 0 : 180), axis: (x: 0.0, y: 1.0, z: 0.0)) //make sure the front text is not mirrored when non flipped
            }
            .rotation3DEffect(Angle(degrees: flipped ? 0 : 180), axis: (x: 0.0, y: 1.0, z: 0.0)) //showing the front or the back depending on the flipped state
            .onTapGesture {
                withAnimation(.easeInOut(duration: 1.0)) {
                    flipped.toggle() //this will trigger the flipping in an animated style
                }
            }
        }
    }
}
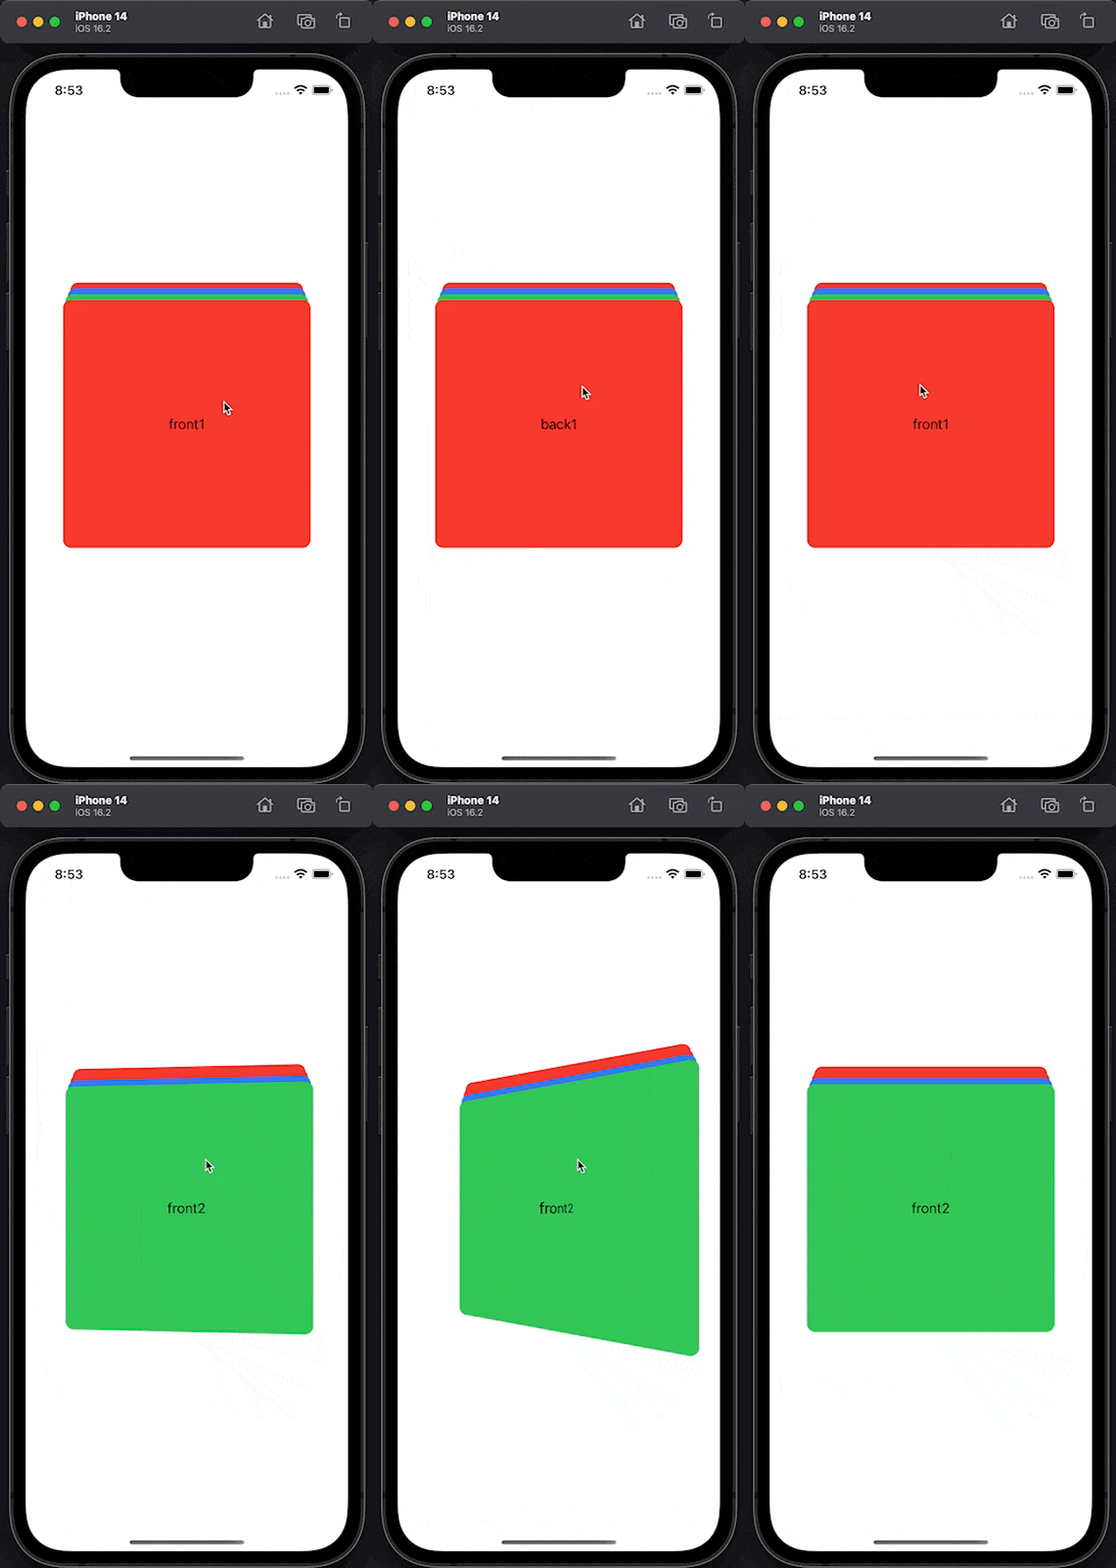
Unfortunately, I had to learn that by doing it like this, the whole stack would flipp around–which is not exactly what I was trying to achieve.

I have to be honest–I have not even looked into the package to try to find out why the DeckView works like that–after reaching out to Daniel via a Github Issue and his valuable hint that I should try to use a state on the card itself, I was able to get exatly what I wanted.
To be able to do this, I needed a new property on Card first of all:
struct Card: DeckItem {
    let id: UUID
    var frontLabel: String
    var backLabel: String
    var color: Color
    var flipped: Bool //introducing the flipped state on the model itself

    init(
        id: UUID = UUID(),
        frontLabel: String,
        backLabel: String,
        color: Color,
        flipped: Bool = false
    ) {
        self.id = id
        self.frontLabel = frontLabel
        self.backLabel = backLabel
        self.color = color
        self.flipped = flipped
    }
}
After that, here are the changes I made on CardStackView:
struct CardStackView: View {
    @State private var deck = Deck(items: [
        Card(frontLabel: "front1", backLabel: "back1", color: .red),
        Card(frontLabel: "front2", backLabel: "back2", color: .green),
        Card(frontLabel: "front3", backLabel: "back3", color: .blue),
        Card(frontLabel: "front4", backLabel: "back4", color: .red),
    ])

    var body: some View {
        DeckView(deck: $deck) { card in
            ZStack {
                ZStack {
                    RoundedRectangle(cornerRadius: 10.0)
                        .foregroundColor(
                            card.color
                        )
                        .frame(width: 300.0, height: 300.0)
                    Text(card.flipped ? card.backLabel : card.frontLabel)
                        .rotation3DEffect(Angle(degrees: card.flipped ? 0 : 180), axis: (x: 0.0, y: 1.0, z: 0.0))
                }
                .onTapGesture {
                    withAnimation(.linear(duration: 1.0)) {
                        card.flipped.toggle()
                    }
                }
                .rotation3DEffect(Angle(degrees: card.flipped ? 0 : 180), axis: (x: 0.0, y: 1.0, z: 0.0))
            }
        }
    }
}
Unfortunately, this did not work–the issue being that the card instance I get in the DeckView closure is not mutable, which this error message shows:

So, I needed another way to mutate the card in the deck directly:
struct CardStackView: View {
    @State private var deck = Deck(items: [
        Card(frontLabel: "front1", backLabel: "back1", color: .red),
        Card(frontLabel: "front2", backLabel: "back2", color: .green),
        Card(frontLabel: "front3", backLabel: "back3", color: .blue),
        Card(frontLabel: "front4", backLabel: "back4", color: .red),
    ])

    var body: some View {
        DeckView(deck: $deck) { card in
            ZStack {
                ZStack {
                    RoundedRectangle(cornerRadius: 10.0)
                        .foregroundColor(
                            card.color
                        )
                        .frame(width: 300.0, height: 300.0)
                    Text(card.flipped ? card.backLabel : card.frontLabel)
                        .rotation3DEffect(Angle(degrees: card.flipped ? 0 : 180), axis: (x: 0.0, y: 1.0, z: 0.0))
                }
                .onTapGesture {
                    withAnimation(.linear(duration: 1.0)) {
                        toggleCard(card)
                    }
                }
                .rotation3DEffect(Angle(degrees: card.flipped ? 0 : 180), axis: (x: 0.0, y: 1.0, z: 0.0))
            }
        }
    }

    func toggleCard(_ card: Card) {
      //The `Deck` type has a member function that will get the index of the card–enabling us to mutate the `Deck` item directly
        if let index = deck.index(of: card) {
            deck.items[index].flipped.toggle()
        }
    }
}
This resulted (almost) in the desired behaviour.

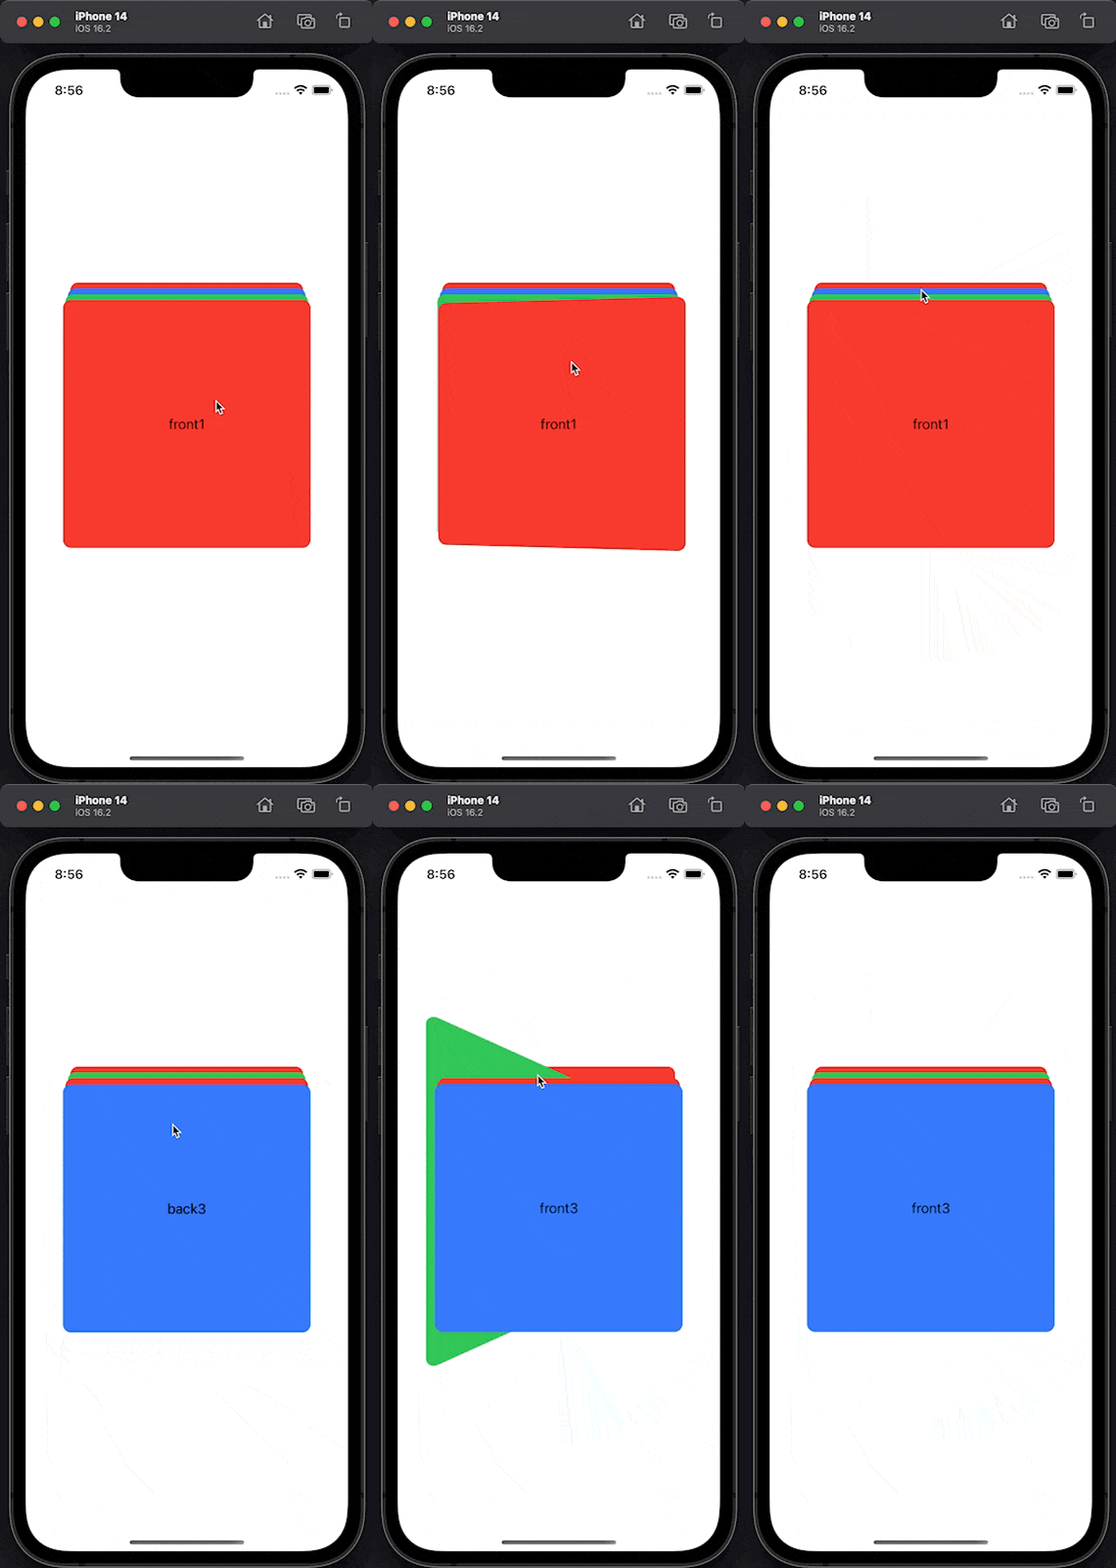
A very subtle issue you can see with this approach is that tapping on card in the background flips exactly this card–even though the card is in the stack. This might be the desired behaviour, but I decided that for me it is not what I want.
Turns out that offering flipping the topmost card only is even more easy–as the Deck's topmost card in the deck will always have the index 0:
struct CardStackView: View {
    @State private var deck = Deck(items: [
        Card(frontLabel: "front1", backLabel: "back1", color: .red),
        Card(frontLabel: "front2", backLabel: "back2", color: .green),
        Card(frontLabel: "front3", backLabel: "back3", color: .blue),
        Card(frontLabel: "front4", backLabel: "back4", color: .red),
    ])

    var body: some View {
        DeckView(deck: $deck) { card in
            ZStack {
                ZStack {
                    RoundedRectangle(cornerRadius: 10.0)
                        .foregroundColor(
                            card.color
                        )
                        .frame(width: 300.0, height: 300.0)
                    Text(card.flipped ? card.backLabel : card.frontLabel)
                        .rotation3DEffect(Angle(degrees: card.flipped ? 0 : 180), axis: (x: 0.0, y: 1.0, z: 0.0))
                }
                .onTapGesture {
                    withAnimation(.linear(duration: 1.0)) {
                        if deck.items.count > 0 { //we shouldn't land here if the deck is empty, so this is just a precautionary measure
                            deck.items[0].flipped.toggle()
                        }
                    }
                }
                .rotation3DEffect(Angle(degrees: card.flipped ? 0 : 180), axis: (x: 0.0, y: 1.0, z: 0.0))
            }
        }
    }
}
Code overview
Before wrapping up, here's the whole app for convenient copy/pasting into Xcode and trying it out (did I mention yet that I love SwiftUI for stuff like this?):
import SwiftUI

@main
struct poc_DeckSetFlipApp: App {
    var body: some Scene {
        WindowGroup {
            CardStackView()
        }
    }
}

struct CardStackView_Previews: PreviewProvider {
    static var previews: some View {
        CardStackView()
    }
}

import DeckKit
struct Card: DeckItem {
    let id: UUID
    var frontLabel: String
    var backLabel: String
    var color: Color
    var flipped: Bool

    init(
        id: UUID = UUID(),
        frontLabel: String,
        backLabel: String,
        color: Color,
        flipped: Bool = false
    ) {
        self.id = id
        self.frontLabel = frontLabel
        self.backLabel = backLabel
        self.color = color
        self.flipped = flipped
    }
}

struct CardStackView: View {
    @State private var deck = Deck(items: [
        Card(frontLabel: "front1", backLabel: "back1", color: .red),
        Card(frontLabel: "front2", backLabel: "back2", color: .green),
        Card(frontLabel: "front3", backLabel: "back3", color: .blue),
        Card(frontLabel: "front4", backLabel: "back4", color: .red),
    ])

    var body: some View {
        DeckView(deck: $deck) { card in
            ZStack {
                ZStack {
                    RoundedRectangle(cornerRadius: 10.0)
                        .foregroundColor(
                            card.color
                        )
                        .frame(width: 300.0, height: 300.0)
                    Text(card.flipped ? card.backLabel : card.frontLabel)
                        .rotation3DEffect(Angle(degrees: card.flipped ? 0 : 180), axis: (x: 0.0, y: 1.0, z: 0.0))
                }
                .onTapGesture {
                    withAnimation(.linear(duration: 1.0)) {
                        if deck.items.count > 0 {
                            deck.items[0].flipped.toggle()
                        }
                    }
                }
                .rotation3DEffect(Angle(degrees: card.flipped ? 0 : 180), axis: (x: 0.0, y: 1.0, z: 0.0))
            }
        }
    }
}
Conclusion
In this little tutorial I showed how to use the DeckKit package to show a deck of cards with the option to flip the topmost card. Hope this is useful–Iit will be for future-me most definately. 😏 Reach out to me on Mastadon, where I am @appfrosch if you have a desire to say hi. 👋